Data Validation Error Messages in Google Sheets
Learn how to set up custom error messages and input messages for data validation in Google Sheets. Reject input or show warnings with clear help text.
Sheets Bootcamp
September 21, 2026
Data validation in Google Sheets can reject bad entries or flag them with a warning, but the default error message is vague. A custom error message tells the person exactly what went wrong and what to enter instead. This guide covers how to set up custom error messages, input messages (help text), and the difference between rejecting input and showing a warning.
In This Guide
- Default vs Custom Error Messages
- How to Set Up a Custom Error Message: Step-by-Step
- Reject Input vs Show Warning
- Add an Input Message to Validated Cells
- Best Practices for Writing Error Messages
- Related Google Sheets Tutorials
- FAQ
Default vs Custom Error Messages
When a validation rule blocks an entry, Google Sheets shows a generic popup that reads something like “There was a problem” followed by the rule’s criteria. It tells the user the input was rejected but doesn’t explain what they should enter instead.
A custom error message replaces that generic popup with your own text. You write the message, so you control exactly what the user sees. Instead of “The data you entered violated the validation rule,” they see “Please choose a valid status: Not Started, In Progress, Complete, or Overdue.”
The difference matters when multiple people use the same spreadsheet. A generic error leaves them guessing. A custom message gets them to the right answer on the next try.
Custom error messages apply to both Reject input and Show warning modes. In Reject input mode, the message appears in the error popup. In Show warning mode, it appears when hovering over the orange triangle in the cell corner.
How to Set Up a Custom Error Message: Step-by-Step
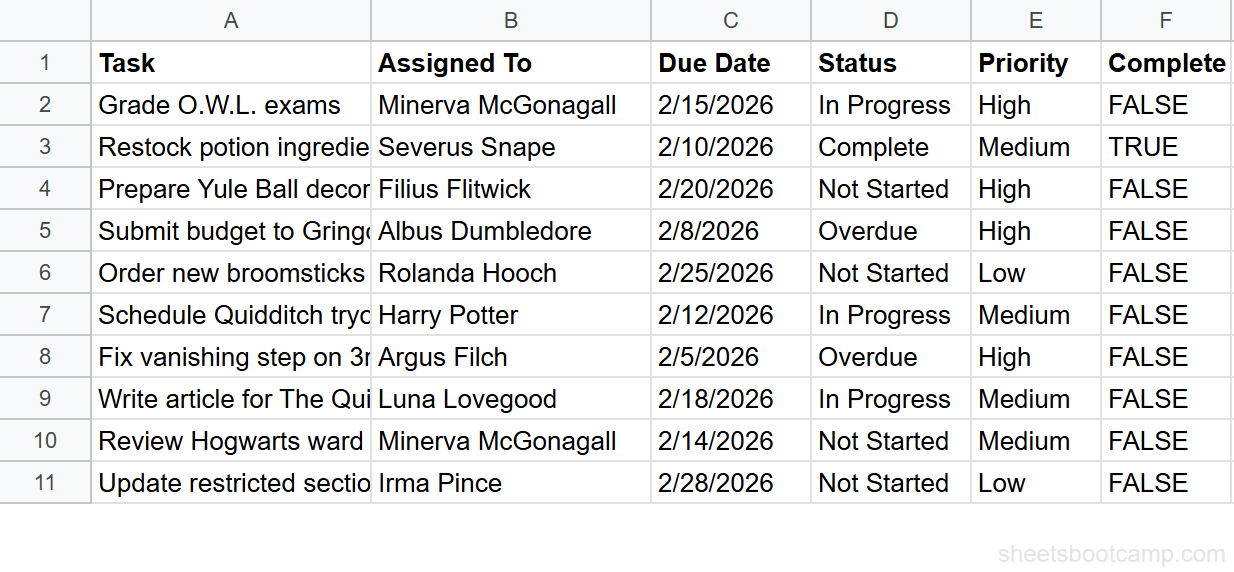
We’ll use a task tracker to add a dropdown validation on the Status column (D2:D11) with a custom error message. The allowed values are Not Started, In Progress, Complete, and Overdue.
| Task | Assigned To | Due Date | Status | Priority | Complete |
|---|---|---|---|---|---|
| Grade O.W.L. exams | Minerva McGonagall | 2/15/2026 | In Progress | High | FALSE |
| Restock potion ingredients | Severus Snape | 2/10/2026 | Complete | Medium | TRUE |
Step 1: Select the Cells and Open Data Validation
Highlight D2:D11 in the Status column. Go to Data > Data validation.
Step 2: Set Your Validation Criteria
Click Add rule. Under Criteria, choose Dropdown and enter four values:
- Not Started
- In Progress
- Complete
- Overdue
Step 3: Choose Reject Input and Add a Custom Error Message
Under If the data is invalid, select Reject input. This blocks any entry not on the list.
Check the box for Show help text for invalid data. A text field appears. Enter your error message:
Please choose a valid status: Not Started, In Progress, Complete, or Overdue.
The help text field has a character limit. Keep your message concise. If the message is too long, Google Sheets truncates it in the popup and the user won’t see the full text.
Step 4: Add an Input Message for Valid Data
While still in the Data validation panel, check Show help text for valid data. Enter a short message:
Select a status from the dropdown.
This text appears as a tooltip whenever someone selects a cell in D2:D11, before they type or click anything. It serves as a prompt, telling users what the cell expects.
Step 5: Click Done and Test
Click Done to save the rule. Now test both messages:
- Select cell D2. You should see the input message tooltip: “Select a status from the dropdown.”
- Type “Pending” (a value not on the list) and press Enter. The custom error message appears: “Please choose a valid status: Not Started, In Progress, Complete, or Overdue.”
Reject Input vs Show Warning
Google Sheets gives you two options for handling invalid data, and each one changes how the error message behaves.
Reject Input
The cell reverts to its previous value. The custom error message (if set) appears in a popup that the user must dismiss. The invalid data never makes it into the cell.
Use this for columns where bad data would break formulas, reports, or downstream processes. The Status column on a task tracker is a good example: if someone types “Done” instead of “Complete,” any filter or formula checking for “Complete” would miss it.
Show Warning
The cell accepts the value but displays an orange triangle in the top-left corner. When the user hovers over the triangle, the custom warning message appears as a tooltip.
Use this for columns where flexibility matters more than strict enforcement. A Priority column might allow “Critical” even though High, Medium, and Low are the standard options. The warning flags the non-standard entry without blocking it.
You can use different modes on different columns in the same sheet. Reject input on the Status column to enforce the dropdown, and Show warning on the Priority column to allow exceptions. Set up each column’s validation rule separately.
Add an Input Message to Validated Cells
Input messages (the Show help text for valid data option) display a tooltip when someone selects a validated cell. The message appears before the user types anything, serving as a preview of what the cell expects.
This is useful when your validation criteria aren’t obvious from the column header alone. A column labeled “Priority” is ambiguous: does it accept High/Medium/Low, or 1/2/3, or something else? An input message removes the guesswork.
Setting Up Input Messages on Multiple Columns
You can add input messages to any validation rule, not only dropdowns. Here’s what they look like on two columns in the task tracker:
| Column | Validation Rule | Input Message |
|---|---|---|
| Status (D) | Dropdown: Not Started, In Progress, Complete, Overdue | Select a status from the dropdown. |
| Priority (E) | Dropdown: High, Medium, Low | Enter High, Medium, or Low. |
Each column has its own Data validation rule with its own input message. Open Data > Data validation, select the rule for the column, check Show help text for valid data, and type the message.
Input messages appear for every cell in the validated range, including cells that already have valid data. If you find this distracting on a sheet with many validated columns, limit input messages to columns where the expected format is not obvious.
Best Practices for Writing Error Messages
A good error message does two things: it explains what went wrong and tells the user what to do instead. A bad one does neither.
-
State the expected values. “Enter High, Medium, or Low” is better than “Invalid entry.” The user should not have to guess what the valid options are.
-
Keep it short. One or two sentences. The popup is small, and long messages get truncated. If the explanation needs more than two sentences, the validation rule itself might be too complex.
-
Use the same language as the column header. If the column is labeled “Status,” the error message should reference “status,” not “task state” or “progress indicator.” Consistency reduces confusion.
-
Write for someone who has never seen the sheet. The person triggering the error might be a collaborator seeing the spreadsheet for the first time. Don’t assume they know the rules.
-
Pair error messages with input messages. The input message prevents the error. The error message catches what the input message didn’t. Together, they cover both sides: before and after the mistake.
Here are examples of weak vs strong error messages:
| Weak | Strong |
|---|---|
| Invalid input. | Enter a date between 1/1/2026 and 12/31/2026. |
| Error. | Priority must be High, Medium, or Low. |
| Bad value. | This cell only accepts numbers greater than 0. |
If you’re using custom formula validation, the error message is even more important. The user has no way to see the underlying formula, so the message is their only clue about what went wrong.
Related Google Sheets Tutorials
- Data Validation in Google Sheets - Full guide to all validation rule types including dropdown, checkbox, and number criteria
- Create a Drop-Down List - Set up dropdown menus to restrict input to a fixed set of values
- Data Validation with Custom Formulas - Write TRUE/FALSE formulas to enforce rules that built-in criteria can’t handle
- Conditional Formatting in Google Sheets - Highlight cells visually based on their values to complement validation rules
Frequently Asked Questions
How do I add a custom error message to data validation in Google Sheets?
Open Data > Data validation, set your criteria, choose Reject input under If the data is invalid, and check Show help text for invalid data. Type your message in the text box. This message replaces the default error popup when someone enters a value that breaks the rule.
What is the difference between Reject input and Show warning in Google Sheets?
Reject input blocks the entry entirely and reverts the cell to its previous value. Show warning allows the entry but marks the cell with an orange triangle in the top-left corner. In both cases, you can add a custom message to explain what went wrong.
How do I add an input message to a validated cell in Google Sheets?
Open Data > Data validation on the cell, then check Show help text for valid data. Enter a message that explains the expected format. The message appears as a tooltip whenever someone selects the cell, before they type anything.
Can I format custom error messages in Google Sheets data validation?
No. Custom error messages in Google Sheets are plain text only. You cannot add bold, italic, links, or line breaks. Keep your message to one or two sentences so it reads clearly in the popup.
Why does my data validation show a default error instead of my custom message?
The custom message only appears if you checked Show help text for invalid data and typed a message in that field. If you left the help text blank or unchecked, Google Sheets shows its generic error popup. Re-open the validation rule and add your message.