How to Wrap Text in Google Sheets
Learn how to wrap text in Google Sheets so long text displays inside cells. Covers wrap, overflow, clip options, shortcuts, and auto-resize tips.
Sheets Bootcamp
March 16, 2026 · Updated November 2, 2026
Wrapping text in Google Sheets makes long text display on multiple lines inside a cell instead of overflowing into adjacent cells or getting cut off. This keeps your columns at a manageable width while showing all the content.
This guide covers the three text wrapping options in Google Sheets (Overflow, Wrap, and Clip), how to apply each one, and how to control row height after wrapping.
In This Guide
- Three Text Wrapping Options
- How to Wrap Text: Step-by-Step
- The Toolbar Shortcut
- Control Row Height After Wrapping
- Wrap Text for an Entire Column or Sheet
- Common Issues and Fixes
- Tips and Best Practices
- Related Google Sheets Tutorials
- FAQ
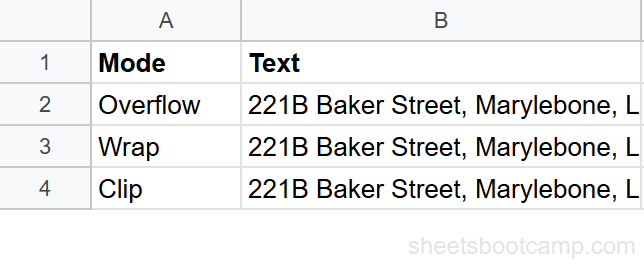
Three Text Wrapping Options
Google Sheets has three text wrapping modes. Each one handles long text differently.
| Mode | Behavior | Best for |
|---|---|---|
| Overflow (default) | Text spills into empty adjacent cells. If the next cell has content, text is hidden. | Short labels where columns are close together |
| Wrap | Text stays inside the cell. Row height expands to show all content. | Addresses, descriptions, notes, any long text |
| Clip | Text is cut off at the cell border. Hidden text is still there but not visible. | Fixed-width layouts where visual alignment matters |
All three modes affect only the display. The full text is always stored in the cell regardless of the wrapping mode. You can see the complete text in the formula bar when you click the cell.
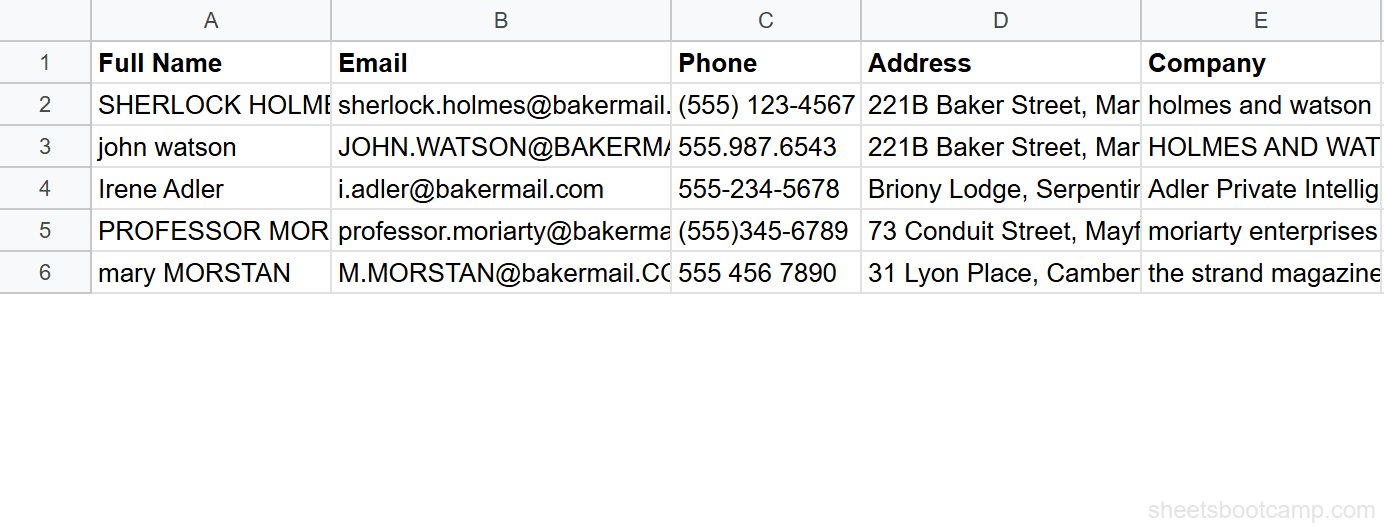
How to Wrap Text: Step-by-Step
Select the cells to wrap
Click the cells, range, or column headers you want to format. To select the entire sheet, press Ctrl+A (Cmd+A on Mac).
Apply text wrapping
Go to Format > Text wrapping > Wrap. The row heights expand immediately to fit the content. Each cell now shows all its text on multiple lines.
Adjust column width if needed
After wrapping, you may want to widen or narrow columns to control how much text appears per line. Drag a column border in the header row, or double-click it to auto-fit to the widest non-wrapped content.
Double-click a column header border to auto-resize that column to fit its content. This works independently of text wrapping and helps you find a good balance between column width and row height.
The Toolbar Shortcut
The text wrapping icon is in the toolbar, to the right of the alignment buttons. It looks like a line of text with an arrow curving down beneath it.
Click the icon to cycle through the three modes, or click the small dropdown arrow next to it to see all three options: Overflow, Wrap, and Clip.
This is the fastest way to toggle text wrapping. No menu navigation required.
Control Row Height After Wrapping
When you wrap text, Google Sheets expands the row height automatically. If you need a specific row height:
- Right-click the row number on the left.
- Select Resize row.
- Enter a pixel height (e.g., 42 for two lines, 63 for three lines at default font size).
- Uncheck Fit to data if you want a fixed height that does not auto-expand.
With a fixed row height and Wrap enabled, text that exceeds the height is hidden. The cell shows as much as fits and the rest is accessible by clicking the cell and reading the formula bar.
Row height affects the entire row. If you fix the row height and one cell has more wrapped text than others, that cell’s content gets clipped visually. Consider using the Clip mode instead if you need uniform row heights.
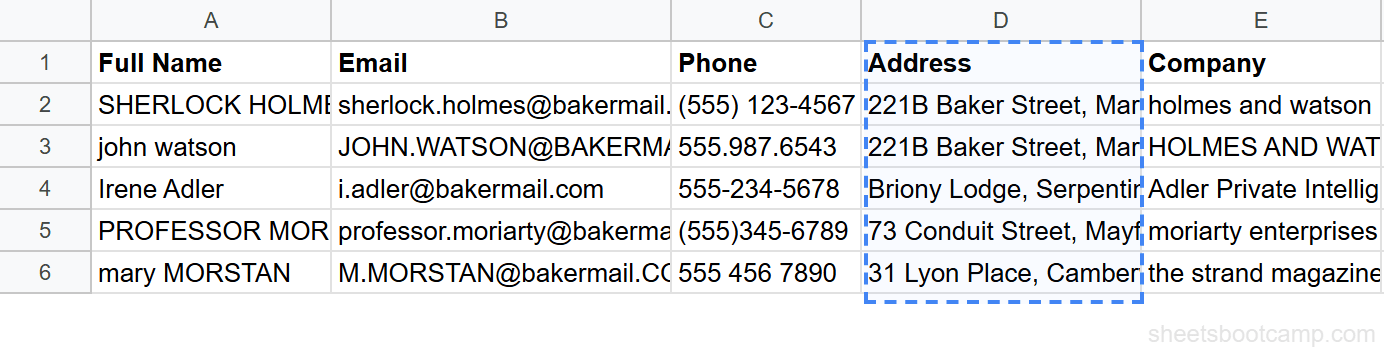
Wrap Text for an Entire Column or Sheet
Wrap an entire column
Click the column letter (e.g., D) to select the whole column. Then go to Format > Text wrapping > Wrap. Every cell in that column, including future entries, uses text wrapping.
Wrap the entire sheet
Press Ctrl+A (Cmd+A on Mac) to select all cells. Apply Format > Text wrapping > Wrap. All current and future cells in the sheet use wrapping by default.
This is useful as the first formatting step when building a new sheet that will contain notes, descriptions, or addresses.
Common Issues and Fixes
Wrapped text makes rows too tall
If a cell has a paragraph of text, the row height grows significantly and pushes other data far down the screen. Consider narrowing the column to reduce line breaks, or switch to Clip mode and let readers click the cell to see the full text in the formula bar.
Text still overflows after wrapping
Make sure you selected the correct cells. Check that Format > Text wrapping shows “Wrap” as the active mode for those cells. If another cell in the same row is overflowing, that cell may still be in Overflow mode.
Merged cells and text wrapping
Text wrapping works with merged cells, but the row height auto-adjustment does not always calculate correctly for merged ranges. You may need to set the row height manually after wrapping text in a merged cell.
Printed output shows clipped text
When printing, Google Sheets uses the on-screen row heights. If wrapped text is partially visible on screen, it will also be partially visible in print. Go to Format > Text wrapping > Wrap and let auto-height adjust before printing.
Tips and Best Practices
- Wrap the Address and Notes columns first. These columns typically have the longest text. Wrapping them immediately improves readability.
- Combine wrapping with frozen rows. Freeze the header row so column labels stay visible while you scroll through tall wrapped rows.
- Use Clip for dashboards. If you’re building a summary view where visual alignment matters more than seeing every character, Clip keeps rows uniform.
- Set column width before wrapping. A wider column means fewer line breaks and shorter row heights. Find the right balance between column count and readability.
- Use TRIM to clean up text before wrapping. Extra spaces and line breaks in the data create unexpected wrapping.
=TRIM(A1)removes extra spaces.
Related Google Sheets Tutorials
- Text Functions in Google Sheets — Functions for cleaning, splitting, and formatting text data
- How to Merge Cells — Combine cells for titles and headers alongside wrapped content
- How to Freeze Rows and Columns — Keep headers visible while scrolling through wrapped data
- TRIM and CLEAN Functions — Remove extra spaces and invisible characters from text before wrapping
FAQ
How do I wrap text in Google Sheets?
Select the cells, then go to Format > Text wrapping > Wrap. The cell height expands automatically so all text is visible on multiple lines within the cell.
What is the difference between Overflow, Wrap, and Clip?
Overflow lets text spill into empty adjacent cells. Wrap keeps text inside the cell by expanding the row height. Clip cuts off text at the cell border and hides the rest. Overflow is the default.
Is there a keyboard shortcut for text wrapping in Google Sheets?
There is no built-in keyboard shortcut for text wrapping in Google Sheets. The fastest method is to use the toolbar icon, which is one click. You can also use Alt+O, then W on Windows to navigate the Format menu.
Why does my row height change when I wrap text?
Google Sheets automatically adjusts row height to fit the wrapped content. If you want a fixed row height, right-click the row number, select Resize row, enter a specific height, and uncheck Fit to data.
Can I wrap text in a single cell without affecting the whole row?
Text wrapping applies per cell, but the row height affects the entire row. If one cell in a row has wrapped text, the entire row expands to fit that cell. Other cells in the row are not affected in their content, only their visual height.
How do I unwrap text in Google Sheets?
Select the cells, then go to Format > Text wrapping > Overflow (the default) or Clip. Overflow lets text spill into adjacent cells. Clip hides text that exceeds the cell width.