Conditional Formatting vs Data Validation in Google Sheets
Learn when to use conditional formatting vs data validation in Google Sheets. Covers what each does, key differences, and when to combine them.
Sheets Bootcamp
February 21, 2026 · Updated October 12, 2026
Conditional formatting and data validation in Google Sheets solve different problems. One changes how cells look. The other controls what cells accept. They’re the two most common ways to manage data quality, and knowing when to use each one saves time and prevents errors.
This guide breaks down what each feature does, when to pick one over the other, and how to combine them for the best results.
In This Guide
- What Conditional Formatting Does
- What Data Validation Does
- Key Differences at a Glance
- When to Use Conditional Formatting
- When to Use Data Validation
- How to Combine Both: Step-by-Step
- Common Mistakes
- Tips and Best Practices
- Related Google Sheets Tutorials
- FAQ
What Conditional Formatting Does
Conditional formatting changes the appearance of cells based on rules you define. It can change background colors, text colors, and text styles. The data itself stays the same. Only the visual presentation changes.
For example, you can highlight all cells with a value above 100 in green, turn overdue dates red, or make cells containing “Complete” bold. The rules evaluate automatically whenever the data changes.
Conditional formatting is a review tool. It helps you scan data faster by making patterns visible. For the full guide, see Conditional Formatting in Google Sheets.
What Data Validation Does
Data validation controls what values a cell will accept. You define a rule, and Google Sheets either rejects invalid entries or shows a warning when someone enters a value that breaks the rule.
Common data validation rules include dropdown lists, number ranges, date restrictions, and custom formula conditions. The cell looks the same either way. Data validation does not change colors or fonts.
Data validation is an input control tool. It prevents bad data from entering your sheet in the first place. For the full guide, see Data Validation in Google Sheets.
Key Differences at a Glance
| Feature | Conditional Formatting | Data Validation |
|---|---|---|
| Purpose | Highlight existing data | Control data entry |
| Changes appearance | Yes (colors, bold, italic) | No |
| Restricts input | No | Yes |
| When it runs | After data exists | During data entry |
| Affects | How cells look | What cells accept |
| Menu location | Format > Conditional formatting | Data > Data validation |
| Works on existing data | Yes | Only on future entries |
Conditional formatting never prevents someone from entering bad data. It only highlights it after the fact. If you need to stop invalid entries, you need data validation.
When to Use Conditional Formatting
Choose conditional formatting when you need to:
- Spot outliers. Highlight revenue below a target, scores above a threshold, or dates past a deadline. Color-coding makes these stand out in a large dataset.
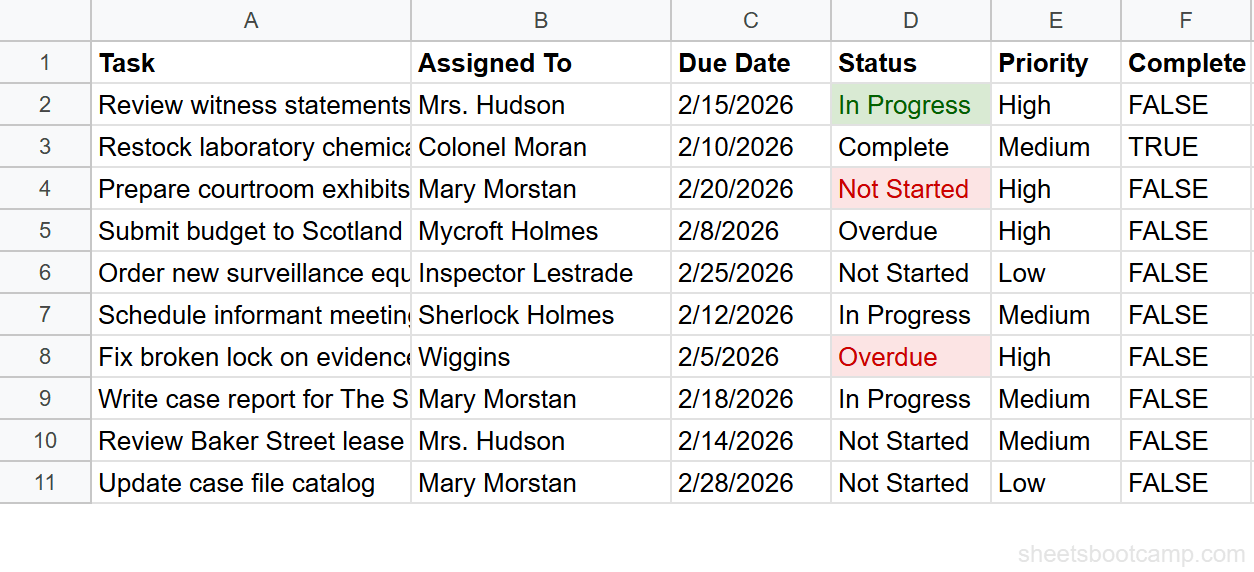
- Track status visually. Turn “Overdue” cells red, “Complete” cells green, and “In Progress” cells yellow so you can scan a project tracker at a glance.
- Compare values across rows. Use color scales to show which salespeople have the highest numbers, or use icon-based formatting for visual ranking.
- Analyze imported data. When you receive data from another source (like IMPORTRANGE), conditional formatting helps you review it quickly without altering the data.
The common thread: your data already exists and you want to see patterns in it.
When to Use Data Validation
Choose data validation when you need to:
- Restrict entries to a set of values. A dropdown list ensures people pick from “High,” “Medium,” or “Low” instead of typing “hi” or “urgent.”
- Enforce number ranges. Limit a quantity column to values between 1 and 1,000 so no one accidentally enters a negative number or a million.
- Require dates within a range. Restrict a due date column to future dates only, preventing someone from entering a date in the past.
- Block invalid data at the source. Using the “Reject input” option stops the entry entirely, which is stronger than fixing errors after the fact.
The common thread: you’re building a sheet that other people will enter data into, and you need to control the input.
Data validation with dependent dropdowns takes this further. You can make one dropdown’s options change based on what was selected in another column.
How to Combine Both: Step-by-Step
The two features work best together. Data validation controls what goes in. Conditional formatting highlights what’s there. Here’s how to set up both on the same column.
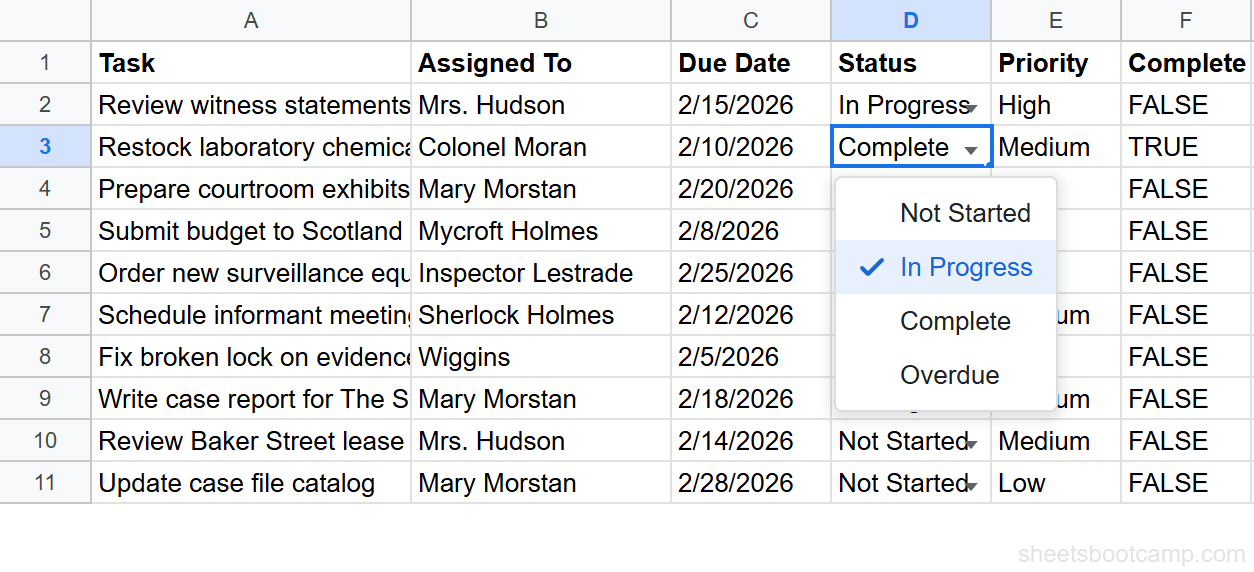
Add data validation to the input column
Select the Status column (D2:D11). Go to Data > Data validation. Set the criteria to List of items and enter: Not Started, In Progress, Complete, Overdue. Set the invalid data behavior to Reject input.
Now every cell in that column shows a dropdown, and only those four values are accepted.
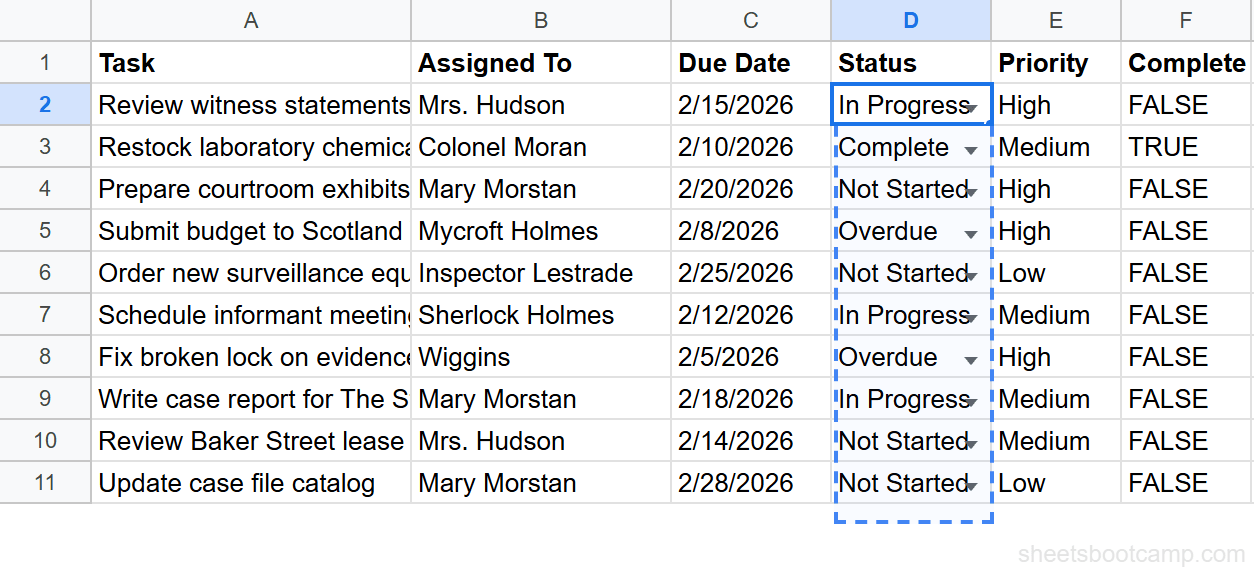
Add conditional formatting rules
Select the same range (D2:D11). Go to Format > Conditional formatting. Create four rules:
- Text is exactly Complete → green background
- Text is exactly In Progress → yellow background
- Text is exactly Overdue → red background
- Text is exactly Not Started → gray background
Each status value now has a color, and only valid values can be entered.
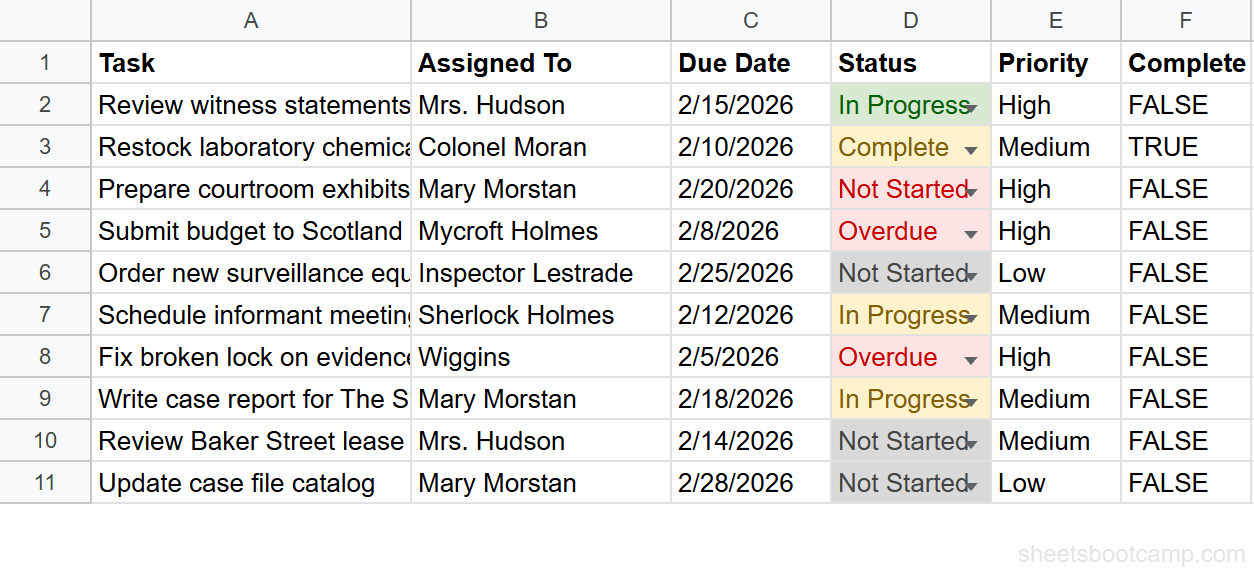
Test the setup
Click a cell in the Status column and select a value from the dropdown. The background color changes automatically. Try typing an invalid value. Google Sheets blocks it with a validation error. Both features work together without conflict.
Apply data validation first, then conditional formatting. This order makes it easier to test. If validation is working, you know the formatting rules only need to handle the valid values.
Common Mistakes
Using conditional formatting to “enforce” rules
Conditional formatting can turn invalid data red, but it does not stop anyone from entering it. If you need to prevent bad data, pair the formatting with data validation.
Applying validation to a column that already has bad data
Data validation only checks new entries. Existing values that violate the rule stay in the cells. To clean up existing data, apply the validation, then review highlighted cells and correct them manually.
Creating too many conditional formatting rules
Each rule is evaluated separately. A sheet with dozens of overlapping rules across large ranges will slow down. Keep rules specific and remove old rules you no longer need through Format > Conditional formatting.
Tips and Best Practices
- Pair them on input sheets. Any column that uses a dropdown should also have conditional formatting to color-code the values. This gives you both control and visibility.
- Use custom formula rules for conditional formatting. Custom formulas let you base a cell’s color on a value in a different column, which is more flexible than basic text matching.
- Document your rules. If you share the sheet, add a legend or a helper tab that explains what each color means and what each validation rule enforces.
- Test with edge cases. Enter blank values, extra spaces, and mixed-case text to make sure both features handle them correctly. Validation is case-insensitive for dropdown lists.
- Review periodically. As your sheet evolves, old formatting rules or validation criteria may become outdated. Check Format > Conditional formatting and Data > Data validation quarterly.
Related Google Sheets Tutorials
- Conditional Formatting in Google Sheets — Full guide to applying color rules based on cell values
- Data Validation in Google Sheets — Full guide to dropdown lists, restrictions, and input controls
- Custom Formula for Conditional Formatting — Use formulas to create advanced color rules based on other cells
- Drop-Down List in Google Sheets — Step-by-step guide to creating dropdown lists with data validation
FAQ
What is the difference between conditional formatting and data validation?
Conditional formatting changes how cells look based on their values. Data validation controls what values cells can accept. Formatting is visual only and does not prevent bad data. Validation restricts input but does not change appearance.
Can I use conditional formatting and data validation on the same cell?
Yes. Both features work independently on the same cell. Data validation restricts what can be entered, and conditional formatting changes the appearance based on the value. They do not interfere with each other.
When should I use conditional formatting instead of data validation?
Use conditional formatting when your data already exists and you want to highlight patterns, outliers, or trends. It is best for reviewing and analyzing data, not controlling input.
When should I use data validation instead of conditional formatting?
Use data validation when you need to control what people enter into cells. Dropdown lists, date restrictions, and number ranges all use data validation. It prevents bad data at the source.
Does conditional formatting slow down Google Sheets?
Many conditional formatting rules on large ranges can slow down a spreadsheet. Keep rules targeted to specific ranges rather than entire columns. Remove rules you no longer need.
Can data validation reject invalid entries automatically?
Yes. Set the validation to Reject input and Google Sheets blocks any value that does not meet the criteria. You can also choose Show warning, which allows the entry but displays a warning triangle.